Learn why backlighting with Light Tape is the way to go, and how we are different than LEDs.

Getting Started
Backlighting doesn’t have to be a daunting task. Stick with us, and we’ll remove the stress. It doesn’t matter if this is your first project or your thousandth, we’ll happily walk you through the process of backlighting your stone or surface step by step from start to finish.
Two easy steps:
-Pick your surface.
-Send us your design (Scroll down for the button labeled “What we need from you”).
We have plenty of experience working with homeowners, designers, and contractors. Ask us any question- we can help.
The most crucial aspect is the translucency of the surface. While every supplier claims their material is translucent and can be lit up, the reality can differ. Translucency exists on a spectrum; even stones from the same source can vary significantly. Some materials may exhibit changes in translucency across the same surface, resulting in areas that do not transmit light.
We recommend thoroughly testing your surface to assess its light responsiveness. Ideally, inspect the slab before purchase and obtain a sample in advance. Material variations can be substantial, so it’s wise to verify firsthand.
We always recommend purchasing a sample of our Light Tape ahead of time to test your surface with for translucency.
Step 1: Confirm Stone Compatibility
-LightTape® is ideal for highly translucent stones.
-Semi-translucent or opaque materials will not deliver the same illumination quality.
-We recommend ordering a LightTape sample to test with your specific stone to ensure the desired lighting effect.
Step 2: Provide Project Measurements
To generate an accurate quote and layout, please provide:
-Overall dimensions of each backlit surface
-Locations and setback measurements of any cutouts (sink, faucet, cooktop, outlets, etc.), measured from the edges of the plywood substrate.
Step 3: Prepare Surface Details
-LightTape should be installed on a plywood substrate that is 1/2″ to 3/4″ thick.
-This substrate is always smaller than the stone top and may be inset into the cabinetry or mitered.
-A 3-5mm foam flooring underlayment should be applied over the substrate and under the LightTape to absorb vibrations and accommodate any air gaps.
Step 4: We Handle the Layout and Power Planning
-Once we receive your measurements, our team will design a custom LightTape layout for your project.
-We will select the appropriate panel widths (available in: 0.5″, 1″, 2″, 4″, 6″, 12″, 18″, and 24″) based on your design.
-LightTape panels are designed to be butted together seamlessly to avoid light breaks.
-We will calculate the total illuminated area and choose the correct drivers for the system.
-For example, a DMX4000 driver powers up to 4,000 square inches.
Step 5: Final Layout & Order Submission
-You will receive a finalized panel layout plan including:
-Panel sizes and locations
-Connector locations (always centered on the narrow side of each panel)
-Which panel connects to which driver
-Once approved, we will proceed with production and shipment.
Step 6: Installation Tips
-Connectors feature a 4″ ribbon tab that folds behind the panel
-The connector tab is fed through a hole in the plywood for a clean, hidden connection
Installation Guidelines Layering Order (Bottom to Top):
1. Plywood substrate
2. Thin underlayment (~3mm, like what’s used under floorboards—available at Lowe’s or Home Depot)
3. Light Tape
4. Stone surface
Wiring Instructions:
You’ll need to route holes in the substrate where the connectors will go, allowing the wiring to run beneath the cabinet or behind the sheetrock (for wall applications).
Adhesive Guidelines:
• Light Tape should be affixed to the underlayment using double-sided tape only—do not use glue directly on the Light Tape.
• If gluing the stone layer, apply adhesive around the perimeter, where the laminate edge is.
• If you plan to leave a perimeter on the substrate for adhesive, be sure to note that in your drawing and adjust the dimensions accordingly. Most people who do this leave a ½” to 1” gap for this purpose.
• Alternatively, you can use a bead of silicone where the stone meets the cabinet, along the corner if you don’t want to leave a perimeter.
Please let me know if you have any questions.
The ultimate goal is to achieve a uniformly illuminated surface. Uneven brightness—such as bright edges and a dim center, or patchy illumination with pronounced cold and hot spots—is undesirable. A surface that’s only 50% translucent, where only parts are illuminated, is likely not preferred. Moreover, greater translucency reveals disparities in illumination more prominently.
These factors in surface composition determine the optimal lighting technology for achieving uniform illumination.
We strongly recommend purchasing a backlighting sample from the shop section of our website. Alternatively, you can easily test the material yourself using your phone flashlight.
Begin by placing the light directly behind the surface. If you observe a dot with a gentle halo around it, resembling Saturn, this indicates good translucency. Moving your phone away from the surface should increase the halo, suggesting the material will evenly distribute light and produce a beautiful glow. If you can see the entire phone through the surface, it’s nearly transparent, and further testing may not be necessary. Light Tape is the ideal solution for either of these surfaces.
Conversely, if you notice only a small illuminated dot with minimal halo, the surface may not be sufficiently translucent. Moving the light away about six inches, does the dot dim significantly, barely visible without a noticeable halo? If so, achieving even illumination across the entire surface will be challenging, requiring numerous light sources. This is where an LED backlight would be better.
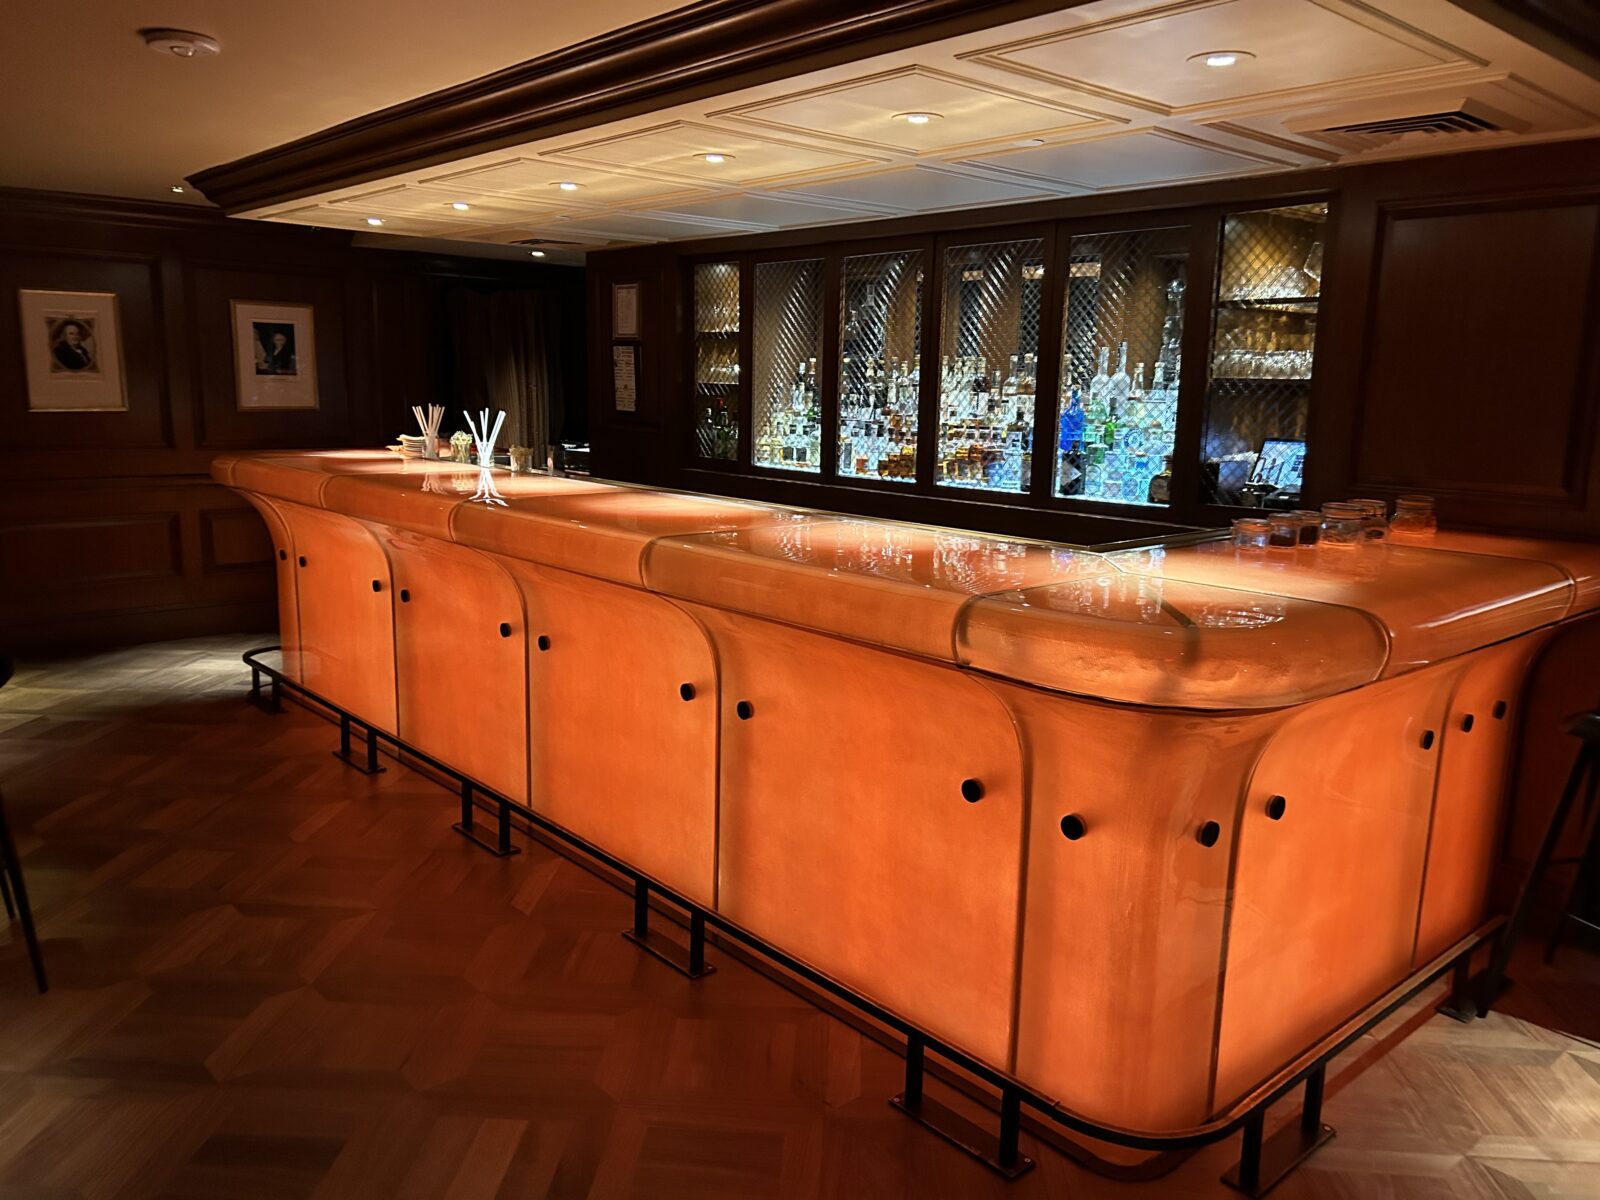
Light Tape® stands out as the most uniform light source available today, evenly illuminating the entire surface with phosphors. It’s ideal for applications where the surface ranges from translucent to transparent, such as glass. We manufacture Light Tape® to match the exact size and shape of your surface, ensuring light coverage under every square inch. If the surface allows light to pass through, Light Tape® will deliver consistent illumination.
In contrast, LEDs function as point light sources. The main challenge lies in creating a uniform appearance from multiple light bulbs, often requiring extensive diffusion. LEDs are better suited for less transparent surfaces where uneven light sources can be diffused. While many LEDs boast advanced light scattering technology, their edge-mounted placement limits the effectiveness of these features, resulting in uneven lighting—especially on irregularly shaped or wide surfaces, or around cutouts like sinks. However, dense surfaces can act as natural diffusers, aiding in achieving more uniform illumination.
For translucent to transparent surfaces, Light Tape® is recommended. For opaque to very dense surfaces, LEDs may offer a better solution. Test the material or reach out to us for advice—we strive to ensure our lighting solutions meet your satisfaction.
We make the process effortless for you. Our laser-cutting machine ensures precise fitting for standard surfaces like islands and wet bars. All you need is a basic sub-surface such as plywood or acrylic to lay the Light Tape® on before applying the final surface.
Using just one panel and connection, we can illuminate surfaces up to 13 feet long and 24 inches wide. If your countertop exceeds 24 inches in width, that’s no issue—we can overlap panels seamlessly, thanks to Light Tape®’s ultra-thin profile. Installation is quick and straightforward; we even pre-cut openings for sinks and faucets. Enjoy consistent, even lighting without concerns about diffusion.
Imagine Light Tape® as a long roll of illuminated material, akin to poster board. What’s more, one power supply can operate multiple Light Tape® panels, reducing electrical requirements.
The Light Tape® is customized to fit your sub-surface, typically plywood, acrylic, or plastic (not metal), with a minimum thickness of 3/8″. The sub-surface serves as the foundation for the Light Tape®, ensuring stability and even illumination. It’s important to note that sub-surface dimensions are typically smaller than the stone top dimensions. We build the Light Tape® panels to fit the sub-surface, not the stone top.
To expedite your order, we prefer simpler shapes such as squares and rectangles for the Light Tape® panels. These shapes can be processed more quickly and cost-effectively.
To get started promptly, we’ll need the dimensions of your sub-surface. Your stone fabricator can provide a template of your kitchen measurements in a scalable file format like .dxf or .dwg, or a detailed PDF or hand-drawn template. If needed, you can send us a paper template of your sub-surface, and we’ll digitize it for our laser cutting process.
Once your dimensions are verified, we cut the Light Tape®, roll it up, and ship it via UPS—no need for crates or cargo shipping.
There are essentially three main options for LED backlighting. The first is small squares, typically around 12″ x 12″ in size, with LEDs positioned around the edges. Another option includes larger acrylic panels with perimeter LEDs. The third choice involves rolls of material embedded with spaced-apart LEDs.
Let’s start with some of the companies offering the 12″ x 12″ square LED options. They can be cut on site and are assembled to illuminate specific areas. However, when used to backlight larger surfaces, such as countertops, differences in light intensity and visible dot patterns can become apparent. Covering irregularly shaped surfaces with these squares often results in uneven illumination, as odd shapes distribute light differently. Installation involves numerous connection points, complicating both installation and maintenance. While initial material costs per square foot may seem economical, these savings are often negated by installation expenses.
Other companies typically offer two main products for backlighting surfaces: edgelit LED acrylic panels or flexible LED sheets. Edgelit panels are suitable for retail and commercial environments with ample natural light, offering a balance between brightness and space efficiency. In contrast, flexible LED sheets provide intense illumination for environments competing against natural light but may be less practical for residential settings, where excessive brightness is unnecessary. These products often ship as large panels via freight, requiring ample space for installation to ensure even lighting and manage heat production. Edgelit panels may struggle with wide surfaces or areas with cutouts, as LED light dots can be visible through highly translucent materials. However, for less transparent surfaces, these panels may present a more suitable option
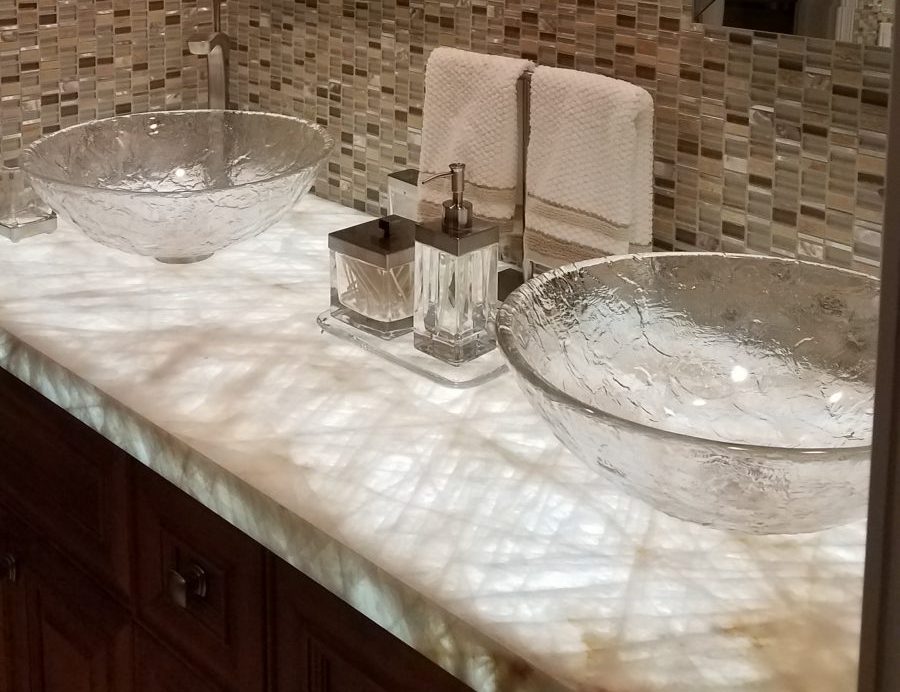
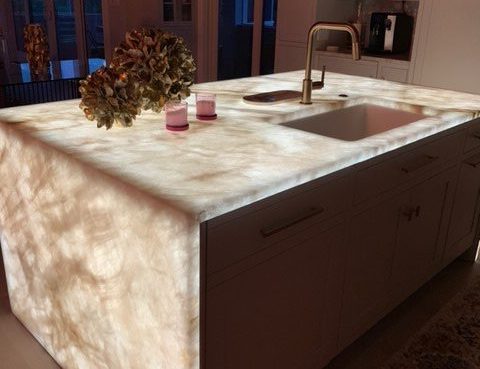
Light Tape® is versatile and compatible with a variety of stone types. Popular choices include onyx, quartzite, blue agate, and stained glass. We collaborate with reputable suppliers such as Sierra Stone, Harkey Stone and Tile, Cole Brothers Stone and Marble, and Peachtree Renovations, among others.
Picking Out Your Stone
We have extensive experience with various surfaces and can assist you in determining the ideal match for Light Tape®. Optimal results are achieved with highly translucent materials. Unlike traditional LED backlights, Light Tape® benefits from surfaces that allow light to pass through without diffusion. With uniform illumination across the entire surface, the absence of individual bulbs ensures even lighting. For surfaces that are highly opaque and allow minimal light penetration, an LED solution may be more suitable.
Below are some surfaces that pair exceptionally well with Light Tape®:
Cristallo Quartzite
Honey Onyx
Blue Agate
Stained Glass, or any highly transparent material.
-Solid surfaces by Avonite, Corian, 3Form, etc.
The thickness of your stone or surface is also important. For Light Tape® we recommend no more than 2cm thick, especially if it’s natural stone. That being said, very translucent stones can be thicker, such as Cristallo.
How To Test A Surface For Translucency
It is important to understand how transparent your surface is. This will dictate whether Light Tape or LEDs is the best solution for backlighting. All you need is your phone flashlight to determine the relative translucency. Please click below for more information regarding our Backlighting Surface Test™.
First, do the test in normal ambient light or low light. This will replicate the installation conditions. If the test area is too bright, it will not show you an accurate result of how translucent the surface is.
The goal of the Backlighting Surface Test™ is to determine how much light passes through your surface. When placing an LED light source from your phone directly on the back of the surface, you will see how much light passes.
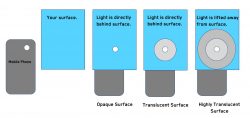
If you just get a little bright dot with no light halo, then you have an opaque surface. If you see a dot with a halo, then you have a more translucent surface. The last step is to slowly back the light away and see if the halo grows. If so, you have a very translucent surface.
Why Is Surface Translucency So Important?
The more translucent your surface, the easier it is for light to pass through, and the less need there is for light diffusion. Remember, it is important to check your surface’s translucency. Not every stone lights the same.

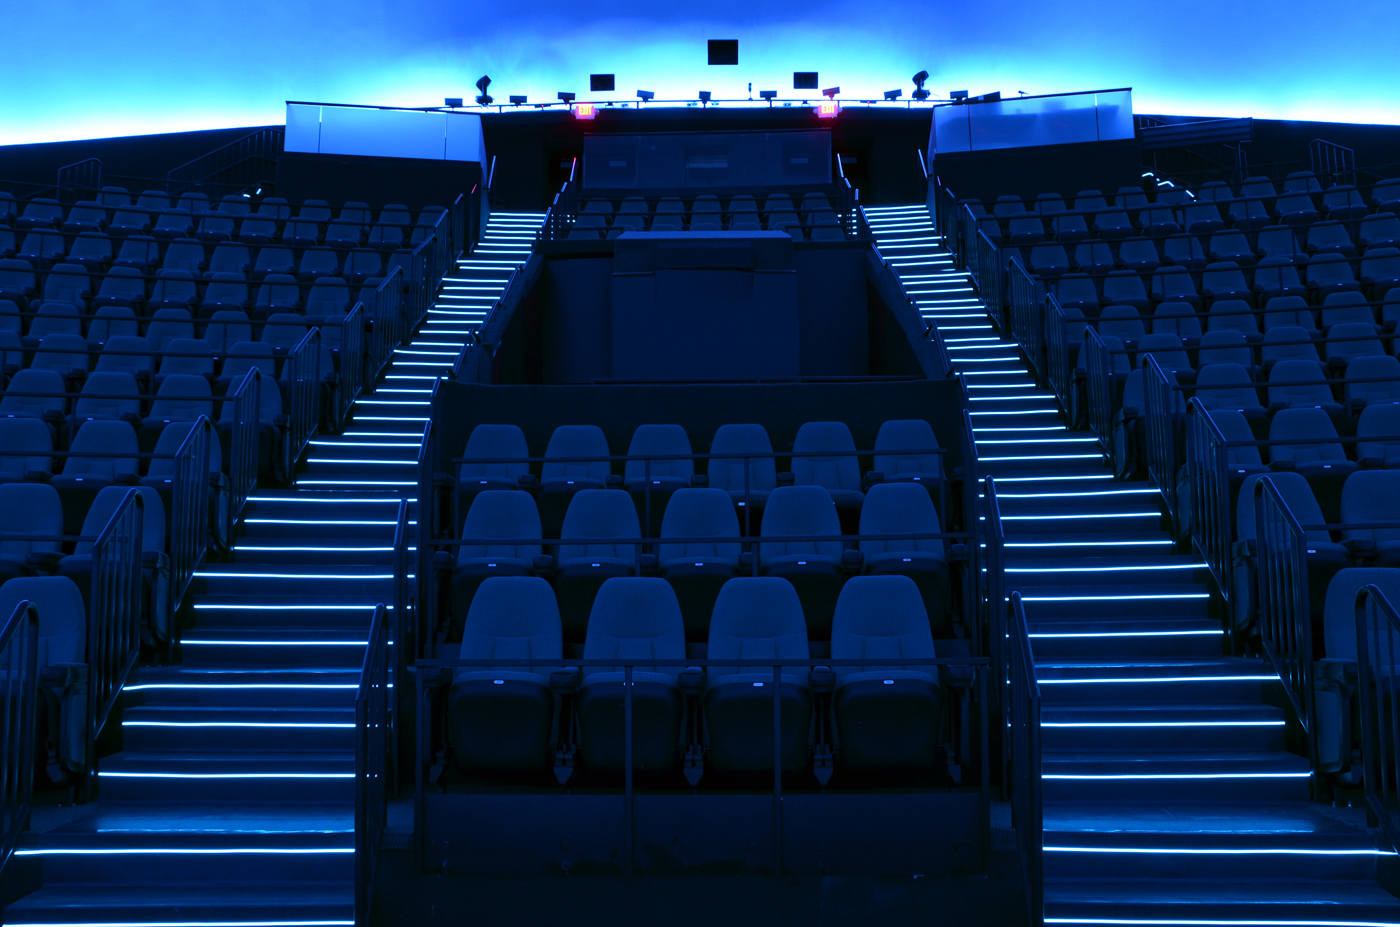
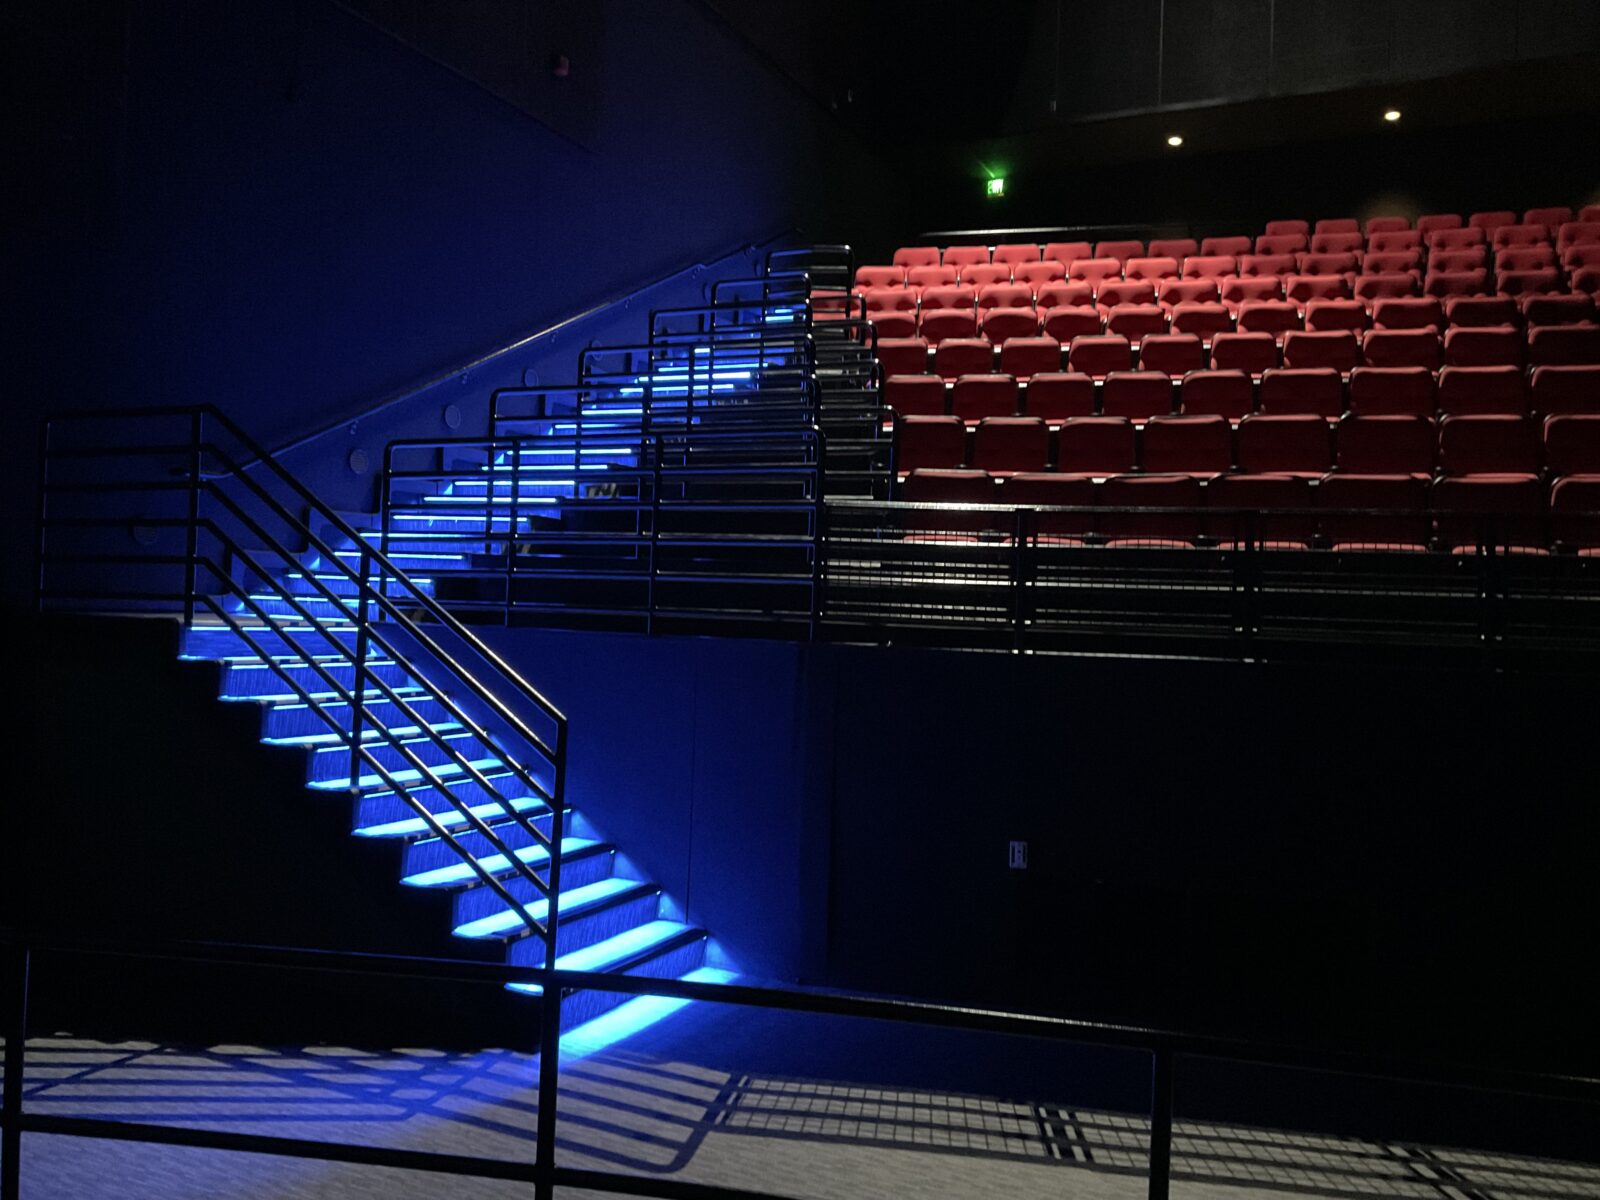
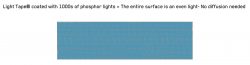
How We're Different From LEDs
Light Tape is coated over a surface with phosphors that is a meter wide. These phosphors glow with electricity and the entire surface lights evenly. Like a long continuous giant poster board that glows.
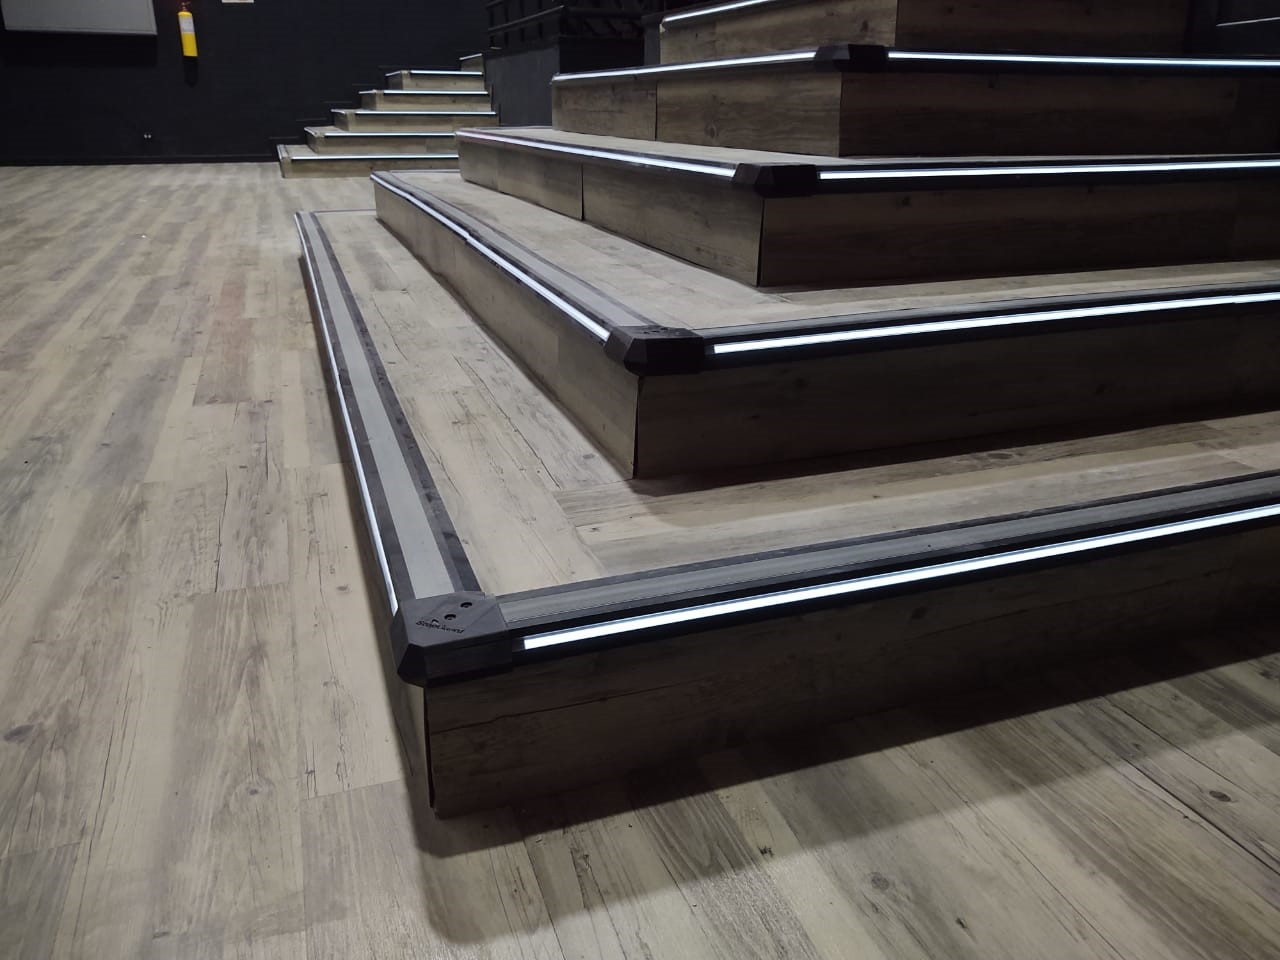
LEDs are single point sources of light. LED backlighting is spread out on a ribbon at different spacings. 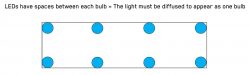
The real challenge with LEDs is making hundreds of tiny bulbs look like one seamless light source. Achieving this usually requires extensive light diffusion and scattering technology. Light Tape® works differently—each panel functions as a single, uniform light, eliminating the need for heavy diffusion.
LEDs work best on surfaces that are less transparent or naturally help diffuse light, while Light Tape® excels in applications where perfect, even illumination is essential.
If your surface is translucent to transparent, use Light Tape®. If your surface is very opaque to very dense, LEDs may be the better option. Test the material and give us a ring if you want our opinion, we don’t want to offer a light that doesn’t make our customers happy. We’ll let you know upfront if we think your surface may be too dense for Light Tape®
How Much Does It Cost To Backlight Your Solid Surface?
Backlighting a counter typically runs about $125 per square foot, but the choice of lighting method can make a big difference in both cost and visual impact. For example, Light Tape delivers an ultra-smooth, uniform glow because the entire surface acts as the light source. It’s also quick to install—just roll it out—keeping labor costs low.
LED setups can be more budget-friendly for certain applications, but the bulbs themselves are only a small part of the cost. The bigger investment lies in high-quality light-diffusing panels that create an even look. Smaller sections often involve detailed wiring and fitting, while large panels may require a team for installation and careful shipping due to their size.
By understanding these factors, you can choose the option that best fits your vision, budget, and installation needs.
Who Are Some LED Backlighting Suppliers?
When it comes to LED backlighting, there are three main formats:
1) 12”x12” rigid plastic squares with LEDs around the edges.
2) Large acrylic panels with edge-mounted LEDs.
3) Flexible sheets or rolls with LEDs embedded and spaced apart.
All three use essentially the same LEDs—just packaged differently.
The most common option, the 12”x12” modular squares, may seem convenient, but the drawbacks quickly add up. To cover a large area, you end up with dozens of small panels, each carrying light differently—especially if they’ve been cut into odd shapes to fit your surface. This leads to visible hotspots, uneven brightness, and a “dotted” appearance. The sheer number of connection points and wires makes installation time-consuming and maintenance frustrating. While the material cost per square foot may look appealing at first, those savings often disappear once labor and troubleshooting are factored in.
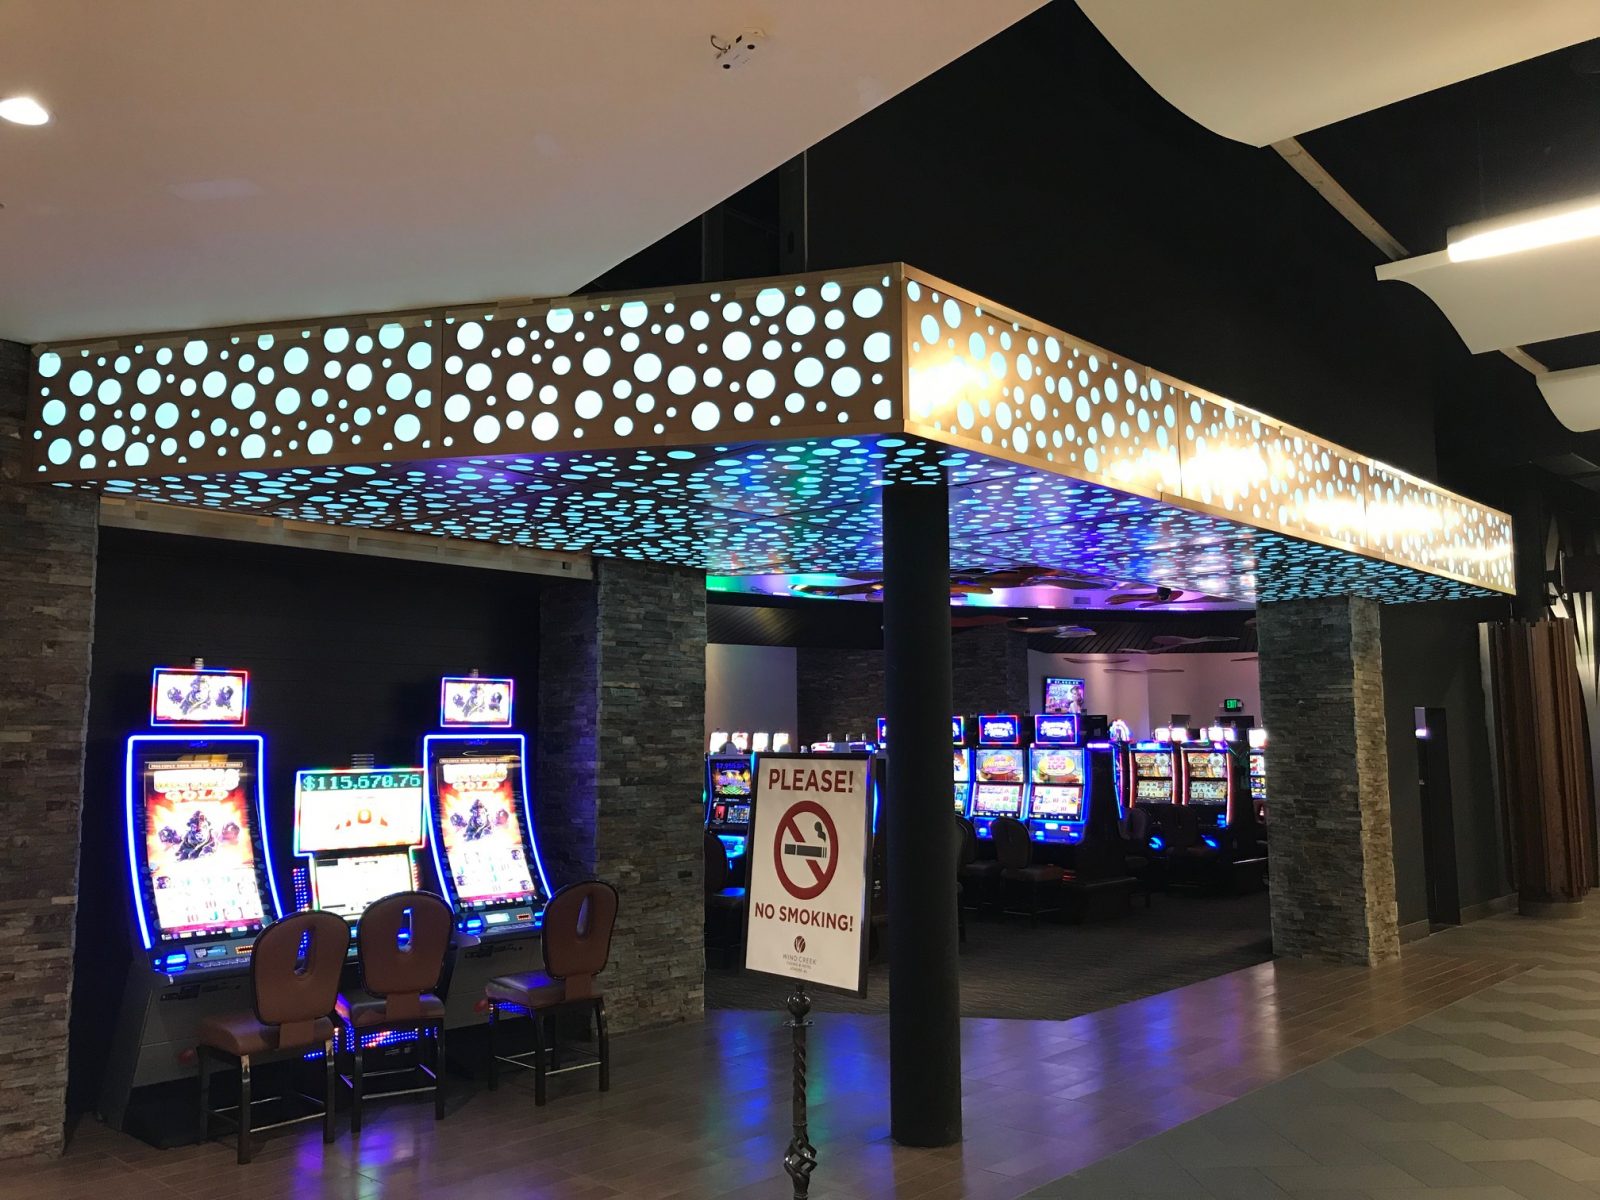
Edge-lit acrylic panels and flexible LED sheets can perform better in certain commercial settings—especially where extreme brightness is needed to compete with natural light, such as in malls or casinos. But in most residential applications, that much brightness isn’t just unnecessary—it can actually be uncomfortable, creating glare and harsh shadows. Plus, these systems require ample space for light diffusion, making them bulky and impractical in tighter installations.
In short, while LEDs might seem like a budget-friendly choice on paper, their complexity, uneven results, and potential for over-brightness often make them more trouble than they’re worth—especially compared to a truly seamless lighting solution.
Don't Sweat The Installation
If you’re working with a stone fabricator, electrician, or contractor, they’ll typically create a project template. We can illuminate any shape, but Light Tape® panels work best with clean, simple outlines like squares and rectangles for optimal performance and efficiency.
All you need to provide is the sub-surface—usually plywood—onto which the Light Tape® will be applied before the final countertop or surface is installed. We’ll need a template of this sub-surface to ensure the panels fit perfectly.
A single Light Tape® panel and connection can illuminate a surface up to 13 feet long and 24 inches wide. For surfaces that are wider or longer, panels can be overlapped thanks to Light Tape®’s ultra-thin profile.
We’ll pre-cut all openings for sinks, faucets, taps, and outlets so installation is simple—just lay the Light Tape® in place and you’re done. No bulky diffusion boxes are required, since Light Tape® produces no heat and doesn’t need a heat sink. It fits seamlessly into your plans with virtually no extra effort.
Think of it as a glowing sheet of paper—thin, flexible, and available in continuous rolls. A single power supply can run multiple panels, minimizing electrical requirements.
Most of the time, your contractor or electrician will handle installation. If they have any questions, they can contact us directly for guidance.
Our full installation manual is linked below, and if you have any additional questions, we’re here to help every step of the way.